PostgreSQL’e Nasıl Bağlanılır
client oel7u501 ‘in ismini çözebildiğini görüyoruz.
|
1 2 3 4 |
mehmed@dataera ~ $ ping oel7u501 PING oel7u501 (192.168.56.11) 56(84) bytes of data. 64 bytes from oel7u501 (192.168.56.11): icmp_seq=1 ttl=64 time=0.477 ms 64 bytes from oel7u501 (192.168.56.11): icmp_seq=2 ttl=64 time=0.542 ms |
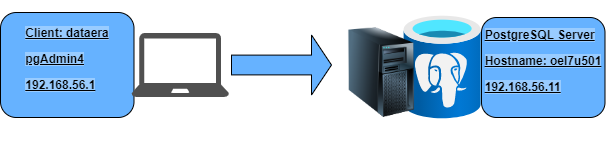
pgAdmin4 ‘de Add New Server ‘e tıklıyoruz bütün bilgiler doğru olduğu halde hata alıyoruz.

![]()
Bu hatanın birden çok nedeni olabilir:
Adım 1:
PotgreSQL sunucuda firewall yani iptables kuralları engelliyor olabilir. Varsayılan olarak PostgreSQL, 5432 numaralı bir TCP bağlantı noktasını dinler. Linux, iptables adlı güvenlik duvarı yardımcı programını kullanır. İstemciye erişim sağlamak için aşağıdaki komutları yürütün.
PostgreSQL’e izin verin.
|
1 |
root@oel7u501 ~ $ iptables -A INPUT -i eth1 -p tcp -s 0.0.0.0 --dport 5432 -j ACCEPT |
Veya erişimi sadece yerel alt ağdan kontrol etmek için aşağıdaki komutu kullanabiliriz.
|
1 |
root@oel7u501 ~ $ iptables -A INPUT -i eth1 -p tcp -s 192.168.56.0/24 --dport 5432 -j ACCEPT |
Tüm bağlantılara gerektiği gibi izin verildiğini kontrol ettiğinizden emin olun.
|
1 |
root@oel7u501 ~ $ iptables -L |
Adım 2:
PostgreSQL hizmetinin doğru sunucu IP adresini ve bağlantı noktasını dinlediğinden emin olun. ((bizim durumumuzda sunucu IP’si 192.168.56.11’dir)
|
1 2 3 4 5 |
root@oel7u501 ~ $ netstat -tnlp |grep 5432 tcp 0 0 127.0.0.1:5432 0.0.0.0:* LISTEN 13365/postmaster tcp6 0 0 ::1:5432 :::* LISTEN 13365/postmaster |
Ardından, sunucunun sunucu IP adresini dinleyebilmesi için PostgreSQL’de değişiklikler yapın.
|
1 2 3 |
vim /var/lib/pgsql/10/data/postgresql.conf listen_addresses = '192.168.56.11' |
Yukarıdaki değişiklikleri uygulamak için PostgreSQL hizmetini yeniden başlatın.
|
1 |
root@oel7u501 ~ $ systemctl restart postgresql-10.service |
Son olarak, aşağıdaki komutla hizmetin doğru bağlantı noktasını dinlediğini kontrol edin.
|
1 2 3 |
root@oel7u501 ~ $ netstat -ntlp |grep 5432 tcp 0 0 192.168.56.11:5432 0.0.0.0:* LISTEN 15799/postmaster |
Adım 3:
PostgreSQL sunucusunda istemcinin IP adresini güvenilir bağlantı olarak giriyoruz.
|
1 2 3 |
root@oel7u501 ~ $ vim /var/lib/pgsql/10/data/pg_hba.conf host all all 192.168.56.0/24 md5 |
Bu şekilde 192.168.56.0 subnet ‘ indeki tüm IP ‘lere erişim izni vermiş olduk.
192.168.56.1/32 ile sadece istediğimiz IP’ye de erişim izni verebiliriz.
Eğer sadece bir sunucu erişecekse tek IP’ye erişim izni vermek daha güvenli olur.
Adım 4:
Yapılandırma dosyasını yeniden yükleme.
|
1 2 3 4 5 6 7 |
postgres=# SELECT pg_reload_conf(); pg_reload_conf ---------------- t |
Şimdi bağlanabiliriz.

Terminal üzerinden bağlantı
|
1 2 3 4 5 6 7 8 9 10 11 12 13 |
root@oel7u502 ~ $ psql -h 192.168.56.11 -p 5432 -d cms -U postgres -W Password for user postgres: psql (9.2.23, server 10.5) WARNING: psql version 9.2, server version 10.0. Some psql features might not work. Type "help" for help. cms=# |
Not : Client versiyonu ile server versiyonu farklı olduğunda uyarı veriyor.
|
1 2 3 4 5 6 7 8 9 |
root@oel7u502 ~ $ /usr/pgsql-10/bin/psql -h 192.168.56.11 -p 5432 -d cms -U postgres -W Password for user postgres: psql (10.5) Type "help" for help. cms=# |
Bağlantıları ve prosesleri görmek için
|
1 2 3 4 5 6 7 8 9 10 11 12 13 14 15 16 17 18 19 20 21 22 23 |
root@oel7u501 ~ $ ps -ef |grep postgres postgres 2374 1 0 06:45 ? 00:00:00 /usr/pgsql-10/bin/postmaster -D /var/lib/pgsql/10/data/ postgres 2376 2374 0 06:45 ? 00:00:00 postgres: logger process postgres 2378 2374 0 06:45 ? 00:00:00 postgres: checkpointer process postgres 2379 2374 0 06:45 ? 00:00:00 postgres: writer process postgres 2380 2374 0 06:45 ? 00:00:00 postgres: wal writer process postgres 2381 2374 0 06:45 ? 00:00:00 postgres: autovacuum launcher process postgres 2382 2374 0 06:45 ? 00:00:02 postgres: stats collector process postgres 2383 2374 0 06:45 ? 00:00:00 postgres: bgworker: logical replication launcher postgres 6887 2374 0 07:58 ? 00:00:29 postgres: postgres postgres 192.168.56.1(59086) idle postgres 6935 2374 0 07:59 ? 00:00:00 postgres: postgres cms 192.168.56.1(59522) idle postgres 17631 2374 0 10:51 ? 00:00:00 postgres: postgres cms 192.168.56.12(38782) idle |